
How to Set Up an Internship Excel Sheet (and When to Upgrade)
Applying for internships is a volume game, whether it feels like it or not. Most students send a handful of applications, lose track of which recruiter has replied, miss a deadline they forgot to save, and quietly give up by week three. The fix isn't more willpower — it's a system. For most people, that system starts as an internship Excel sheet.
Here's how to build one that actually works, and how to know when it's time to move on.
Start with the right columns
A useful tracker isn't a list of company names. It's a decision tool. Set up one row per application and these columns going across:
- Company and Role title
- Location and Work mode (on-site, hybrid, remote)
- Application link — the original posting, so you can re-read the job description before an interview
- Date applied
- Status — keep this to a fixed set: Saved → Applied → Interview → Offer, plus Rejected
- Deadline — many internship postings close on a rolling basis, so capture this early
- Contact — recruiter name or careers email, if listed
- Notes — interview times, follow-up dates, anything you'll otherwise forget
The single most valuable column is the application link. Internship postings disappear quickly, and re-reading the description is the easiest way to prepare for a screening call.
Add a tab for the materials you send
Every application has a resume version and usually a cover letter. Keep a second tab that maps each one to the job:
| Column | What goes in it | | --- | --- | | Company / Role | Matches the main tracker row | | Resume version | Filename or a short label | | Cover letter | Filename or a short label | | Tailored? | Yes / No | | Sent date | When you submitted |
This matters more than it sounds. If a recruiter calls about "the marketing internship," you want to open the exact resume you sent in ten seconds, not dig through downloads.
Set up a simple status flow
Status columns only help if the values are consistent. Pick one pipeline and stick to it:
- Saved — found it, haven't applied yet
- Applied — submitted
- Interview — any stage of screening, assessment, or interview
- Offer
- Rejected — keep these rows; patterns in rejections are useful
Use conditional formatting or a dropdown so the status column stays clean. A messy status column turns a tracker into a diary, and a diary doesn't tell you what to do next.
Build a weekly review habit
The sheet only earns its keep if you look at it. Block thirty minutes once a week and do three things:
- Clear the Saved rows. Either apply this week or delete them. Saved rows that sit for a month are clutter pretending to be progress.
- Check follow-ups. Any application older than a week or two with no reply is a candidate for a polite check-in, if the posting listed a contact.
- Count. How many did you actually apply to this week? This number is your real metric — not how many postings you browsed.
Where the spreadsheet starts to strain
An Excel sheet is a great starting point, and for a first ten or twenty applications it's genuinely enough. The problems show up when volume increases:
- Every application means rewriting the same fields. Name, phone, work history, education, the same essay prompts — retyped on every company's portal.
- Tailoring is slow. Rewriting your resume to match each job description takes fifteen to twenty minutes if you do it properly. Do that for twenty roles and the sheet is no longer the bottleneck — the writing is.
- The sheet and the files drift apart. Your tracker says "Applied" but you can't remember which resume version went where, or the link you saved now 404s.
- Logins multiply. Every careers site wants an account, and internship portals are notorious for locked-out password resets mid-application.
That's the point where the spreadsheet stops being a system and starts being another task.
What upgrading looks like
Amploy is built for exactly that moment. It's a Chrome extension plus a website that handles the repetitive parts of applying so the tracker stays useful instead of becoming a second job.
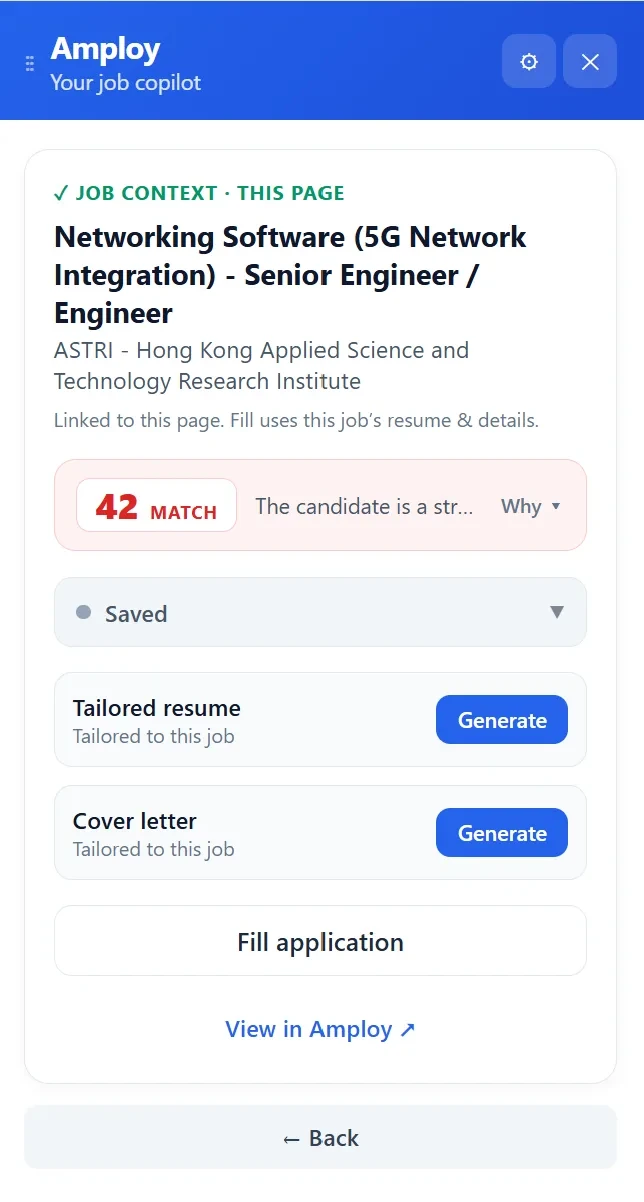
When you're on a job posting, the extension reads the role and gives you a match score plus three actions: generate a tailored resume, generate a cover letter, or fill the application. The tailoring pulls from your real experience and rewrites it against the job description — a first draft you edit for your own voice, not something you accept blindly.
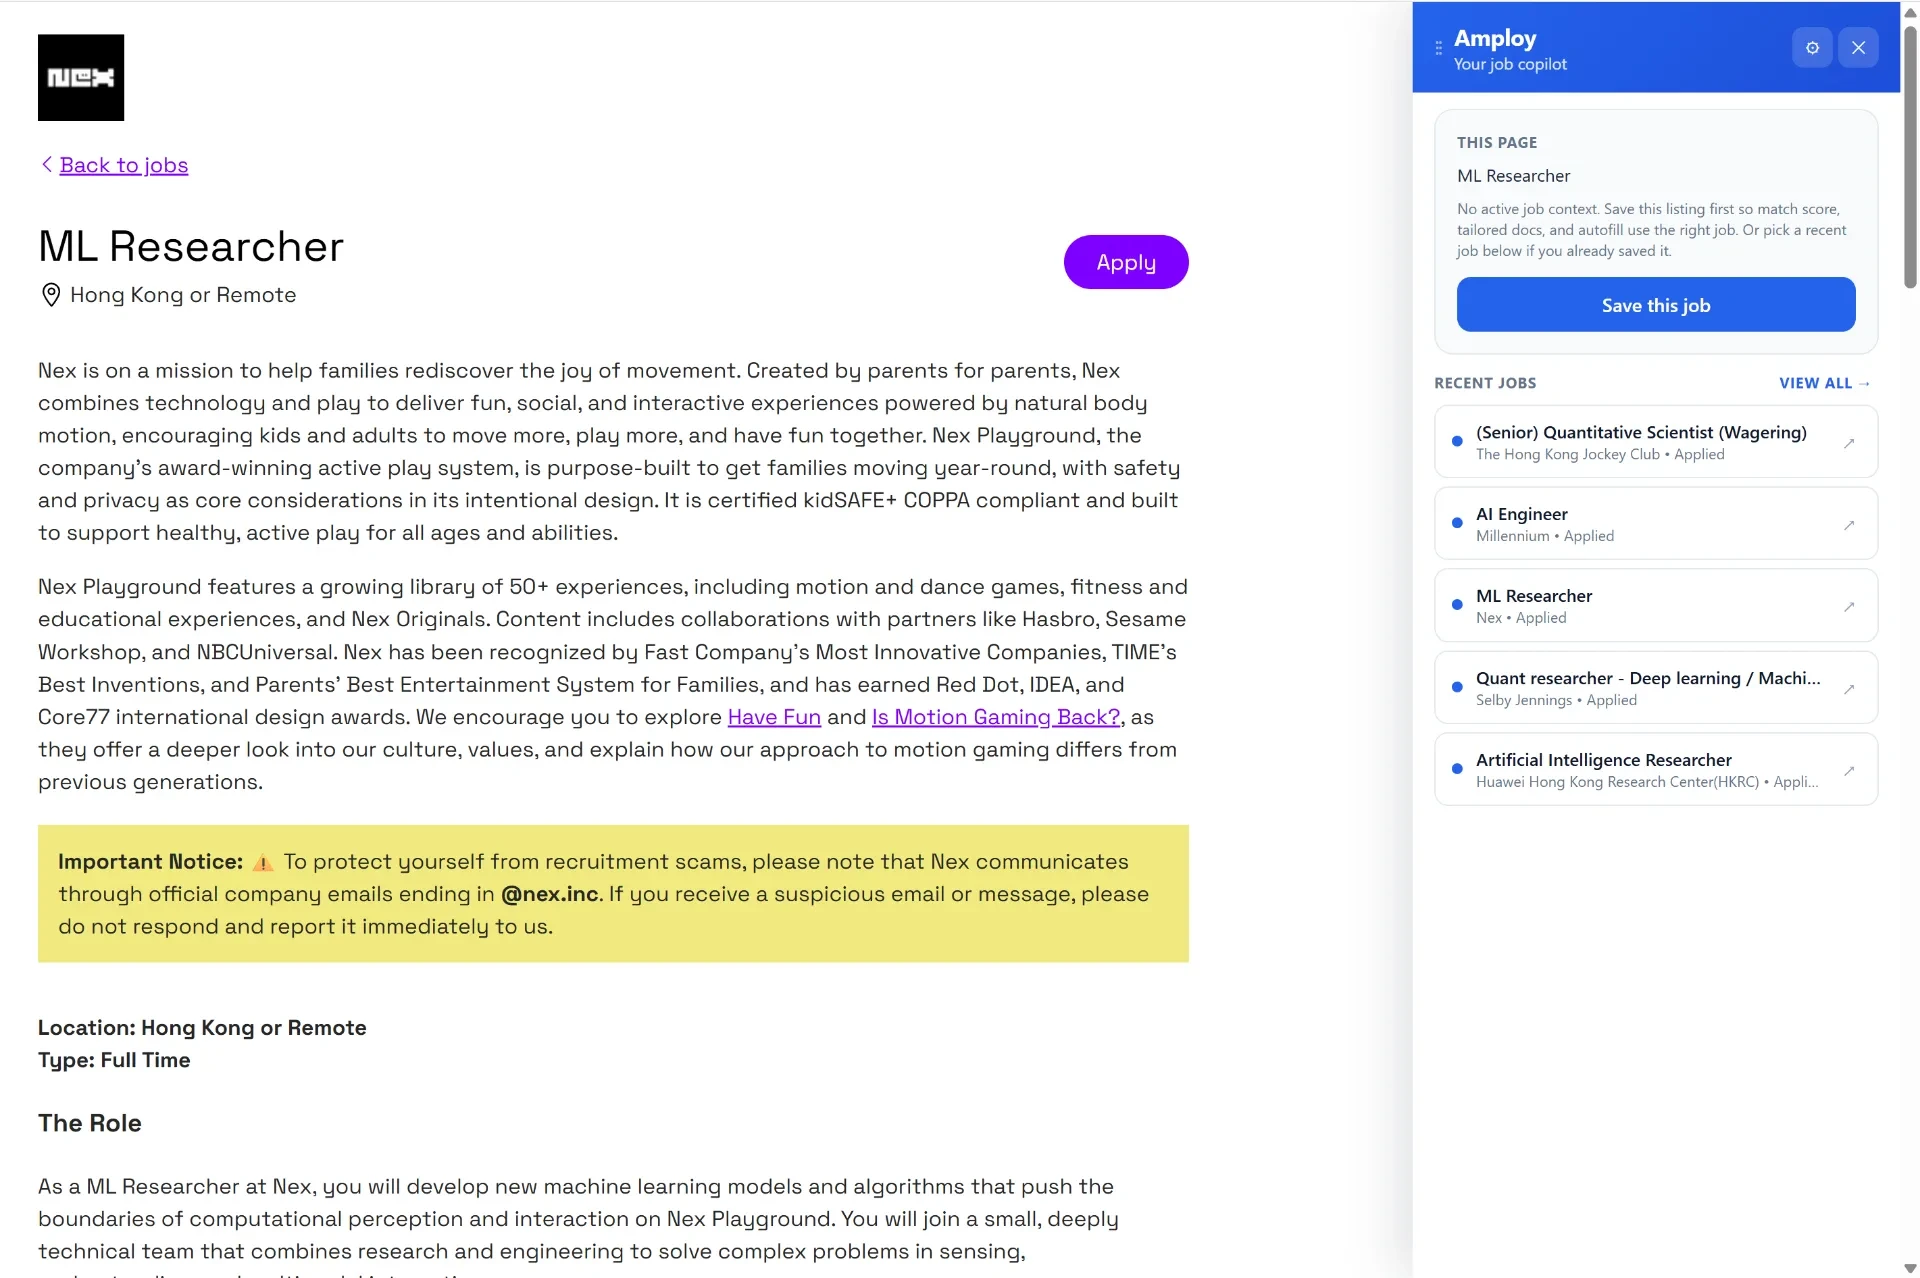
Autofill does the tedious part: name, phone, work history, and essays filled from your profile in one click, on each company's own application form.
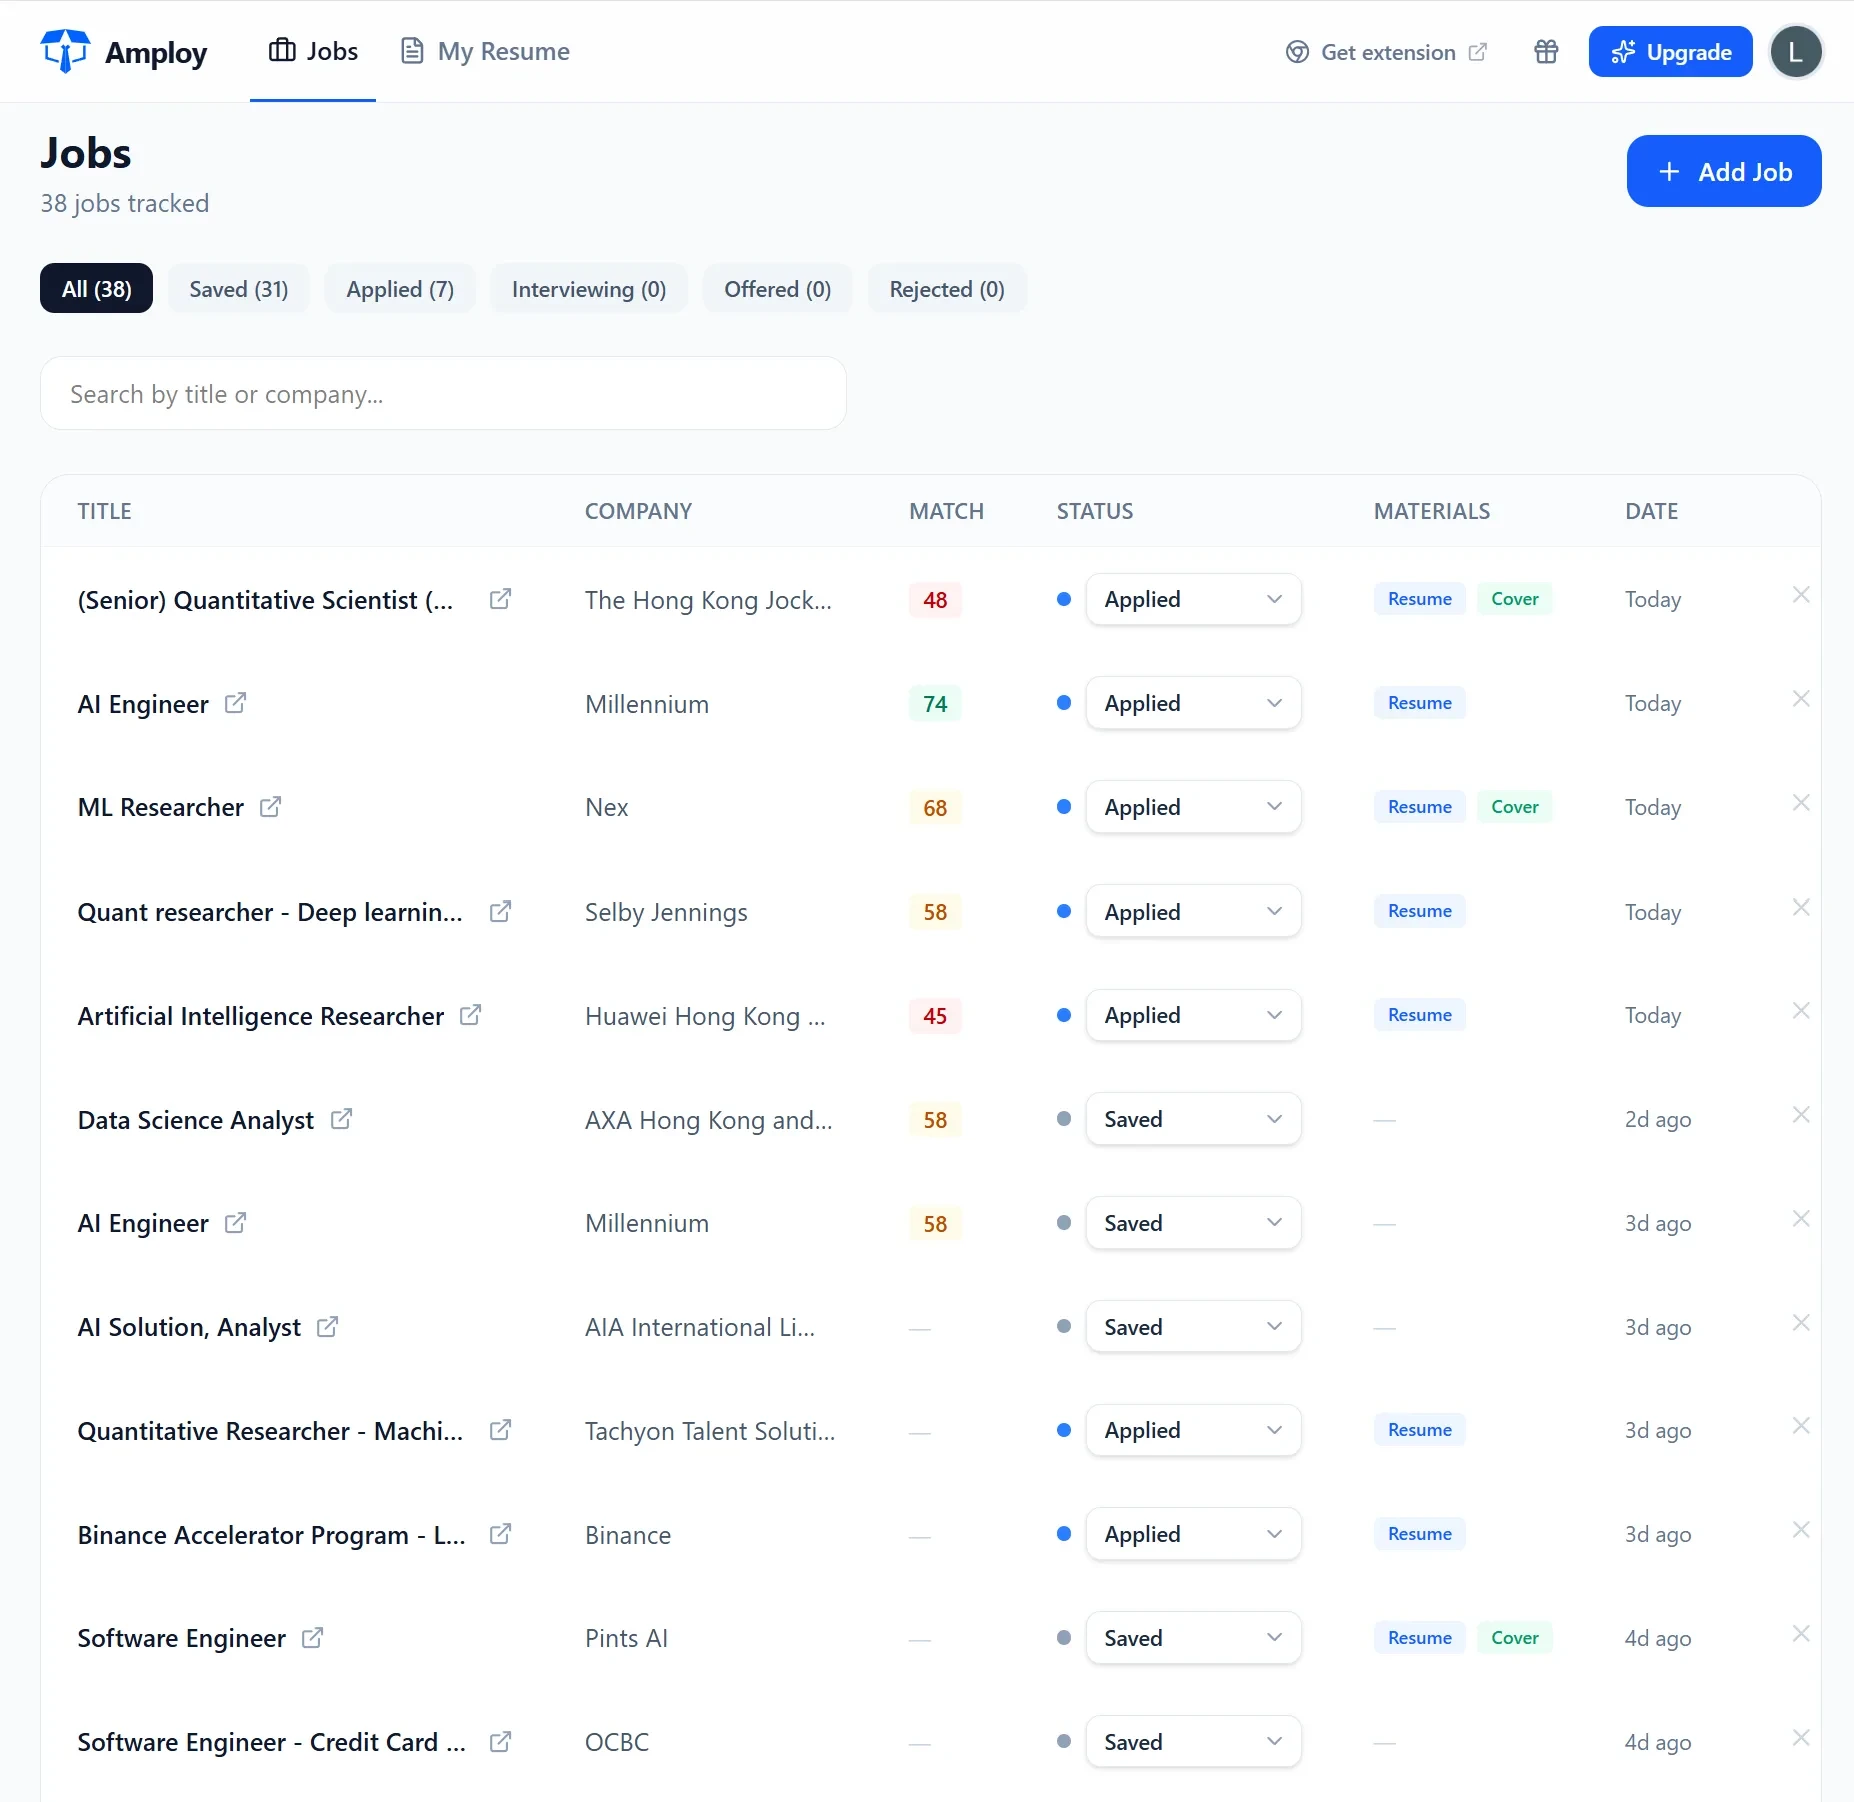
And instead of a spreadsheet tab, the job tracker keeps a status pipeline — Saved → Applied → Interview → Offer — with each tailored resume and cover letter attached to the role it was written for.
The password saver is the quiet win: one saved login per career site, so you're not resetting a password in the middle of an application with a deadline that day.

When to keep the sheet
Don't upgrade just to upgrade. Keep the Excel sheet if:
- You're applying to fewer than about ten roles and want a lightweight overview
- You need a place for information Amploy's tracker doesn't cover, like interview prep notes or salary research
- You like having one file you own and control
Many people run both — Amploy for applying and tracking status, a sheet for anything personal you want to keep. What you shouldn't do is let the sheet absorb the work that actually moves your applications forward.
The bottom line
An internship Excel sheet is a solid first system: clear columns, a materials tab, a fixed status flow, and a weekly review. Set it up properly and it will carry you through your first batch of applications.
When the busywork — retyping forms, rewriting resumes, hunting for which file went where — starts costing more than the tracking is worth, that's your signal. Amploy exists to remove that busywork so you can apply to more roles, faster, without burning out. Install the extension, fill in your profile once, and let the tracker handle the pipeline while you focus on the part that's actually yours: the interview.